Custom Experiences - Workflow Collect
Learn how to personalise the Workflow Collect interface with your own branding.
How to set up your Custom Experience
Custom Experience configuration is currently done via the Youtrust app only. It cannot be set via API at this stage.
Step 1: Create a Custom Experience in the app
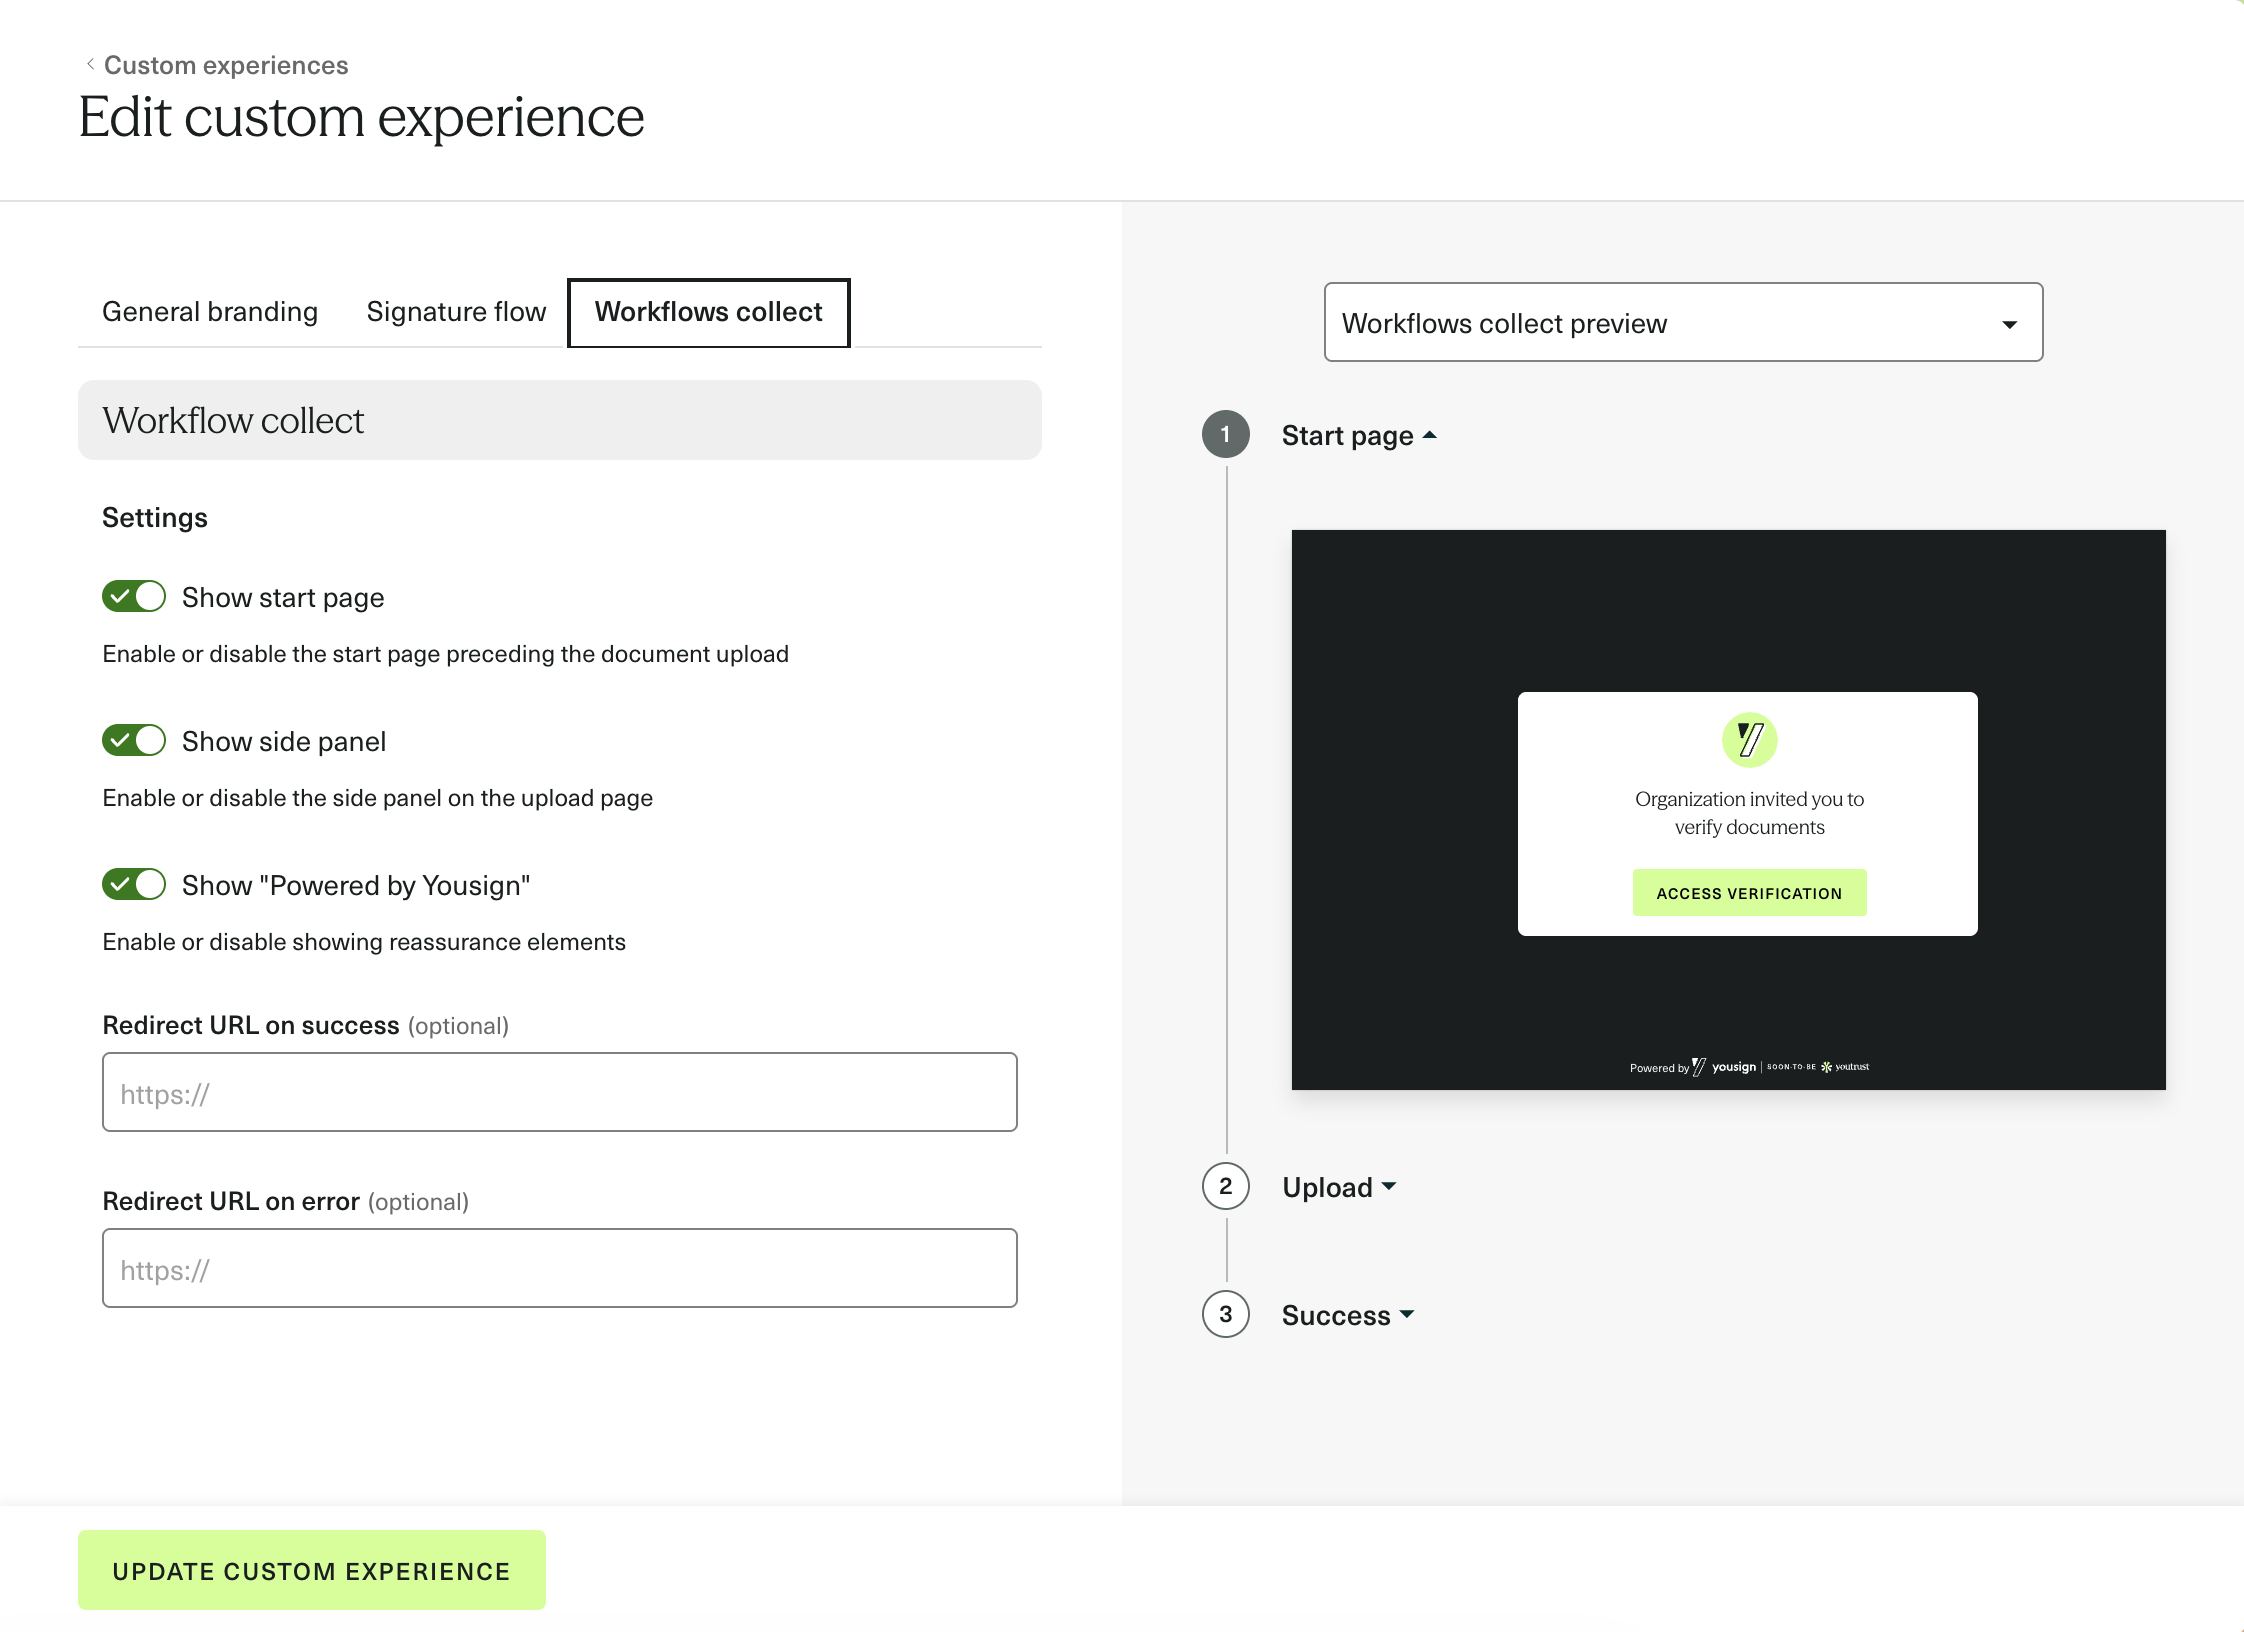
Go to the Custom Experiences section in the Youtrust app. Under the Workflows collect tab, configure your branding, flow settings and redirect URLs, then save.
Step 2: Retrieve the Custom Experience ID
Once saved, copy the Custom Experience ID generated by the app.
Step 3: Share it with our team
Contact our team and provide your Custom Experience ID. We will create a Workflow Template with that ID attached.
Step 4: Use your template as usual
From this point, every Workflow Session Link generated from that template will display your fully branded document collection journey.
The Custom Experience is configured directly in the Youtrust app and attached to a Workflow Template. Any update made to the Custom Experience is reflected instantly across all sessions using that template, no need to recreate it.
What can you customise?
The Workflows collect tab in the Custom Experience editor lets you configure:
Branding
- Company logo
- Background color
- Text color
- Button color and text button color
Flow settings Setting
| Setting | Description |
|---|---|
| Show start page | Enable or disable the start page preceding the document upload |
| Show side panel | Enable or disable the side panel on the upload page |
| Show "Powered by Youtrust" | Enable or disable the reassurance badge |
Redirect URLs
- Redirect URL on success (optional): redirect the end user once all documents are successfully submitted
- Redirect URL on error (optional): redirect the end user if an error occurs